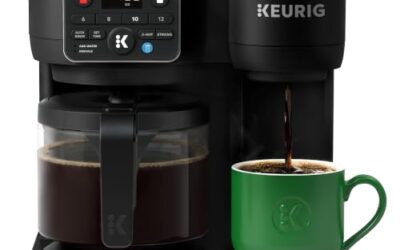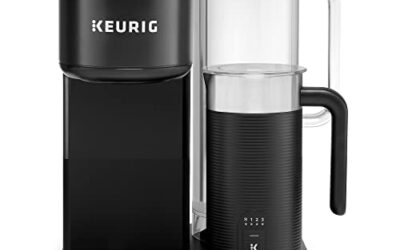

If your Keurig suddenly brews only half a cup, a blocked exit needle or restricted water flow is a likely place to start. The cause can also be a low reservoir, incorrect brew setting, or a problem that needs model-specific support.
Start with simple checks before taking anything apart: confirm the reservoir is seated and filled, then run a water-only brew. For more background on brewer types and their routines, see our Keurig coffee maker guide.
1. Check water level and reservoir seating
A reservoir that is nearly empty, tilted, or not fully seated may prevent the brewer from drawing enough water. Unplug the machine, remove the reservoir if your model allows it, and reseat it firmly on its base.
Fill to a marked level, check that the intake area is clear, and try a water-only brew without a pod. If the cup fills normally, the issue may have been reservoir placement or a temporary water-feed interruption.
2. Clean the pod holder and exit needle
Ground coffee or pod material can obstruct the needle that punctures the pod and lets brewed coffee flow out. A partial blockage can slow dispensing or stop it early, even when the reservoir still contains water.
Turn the brewer off and unplug it first. Follow your model manual for removing and cleaning the pod holder or needle; use only the recommended method, since needle assemblies can be sharp.
Rinse removable parts and clear visible debris without forcing tools into the machine. Reassemble everything correctly, then run a water-only cycle to check flow before brewing another pod.
3. Run a water-only cycle and observe flow
Brewing without a pod separates a water-delivery problem from a pod or coffee-ground blockage. If water also stops early, focus on the reservoir, internal flow path, and descaling rather than changing coffee pods.
Use a large, heat-safe mug and stay nearby while the cycle runs. Note whether flow starts normally, slows, sputters, or ends abruptly; that observation can help narrow the problem without opening the brewer.
4. Descale when mineral buildup may restrict flow
Mineral deposits from water can build up inside a brewer and interfere with water movement or heating. Descaling is maintenance, not a guaranteed fix, and the correct product and procedure depend on the specific Keurig model.
Check the manual for approved descaling instructions, solution, and rinse steps. Do not substitute vinegar unless the manufacturer permits it; residues or an unsuitable process may cause problems or leave lingering odor.
If the brewer signals that descaling is needed, follow its stated process fully, including any required pauses and fresh-water rinses. A clean reservoir and regular maintenance can reduce buildup, but water hardness affects how often descaling is needed.
5. Confirm brew size and settings
Some Keurig brewers offer multiple cup sizes, and the selected setting determines how much water the machine is meant to dispense. Check the chosen size before assuming the brewer has malfunctioned.
Also check whether a strong setting changes the brew cycle on your model. Settings vary, so consult the manual instead of assuming every button or indicator means the same thing across Keurig machines.
6. Consider pod fit and brew interruption
A damaged, incorrectly seated, or incompatible pod may interfere with puncturing or coffee flow. Remove it after the brewer cools, check the holder for loose grounds, and try a fresh compatible pod only after a water-only cycle works.
Make sure the lid closes as intended and avoid lifting it during brewing. If the machine loses power or the cycle is interrupted, let it return to its normal ready state before starting another brew.
7. Stop troubleshooting when symptoms point to a fault
Repeated short brews after cleaning, correct reservoir placement, and model-approved descaling may indicate an internal fault. Leaking, unusual electrical behavior, persistent warning lights, or a pump that runs without dispensing water are reasons to stop and consult manufacturer support.
Do not open the machine or attempt electrical repairs unless the manufacturer specifically provides safe instructions for that work. Check warranty terms before using a repair shop or continuing troubleshooting, since unauthorized work may affect coverage.
Why You Should Trust Us
This guide uses general troubleshooting principles and distinguishes common maintenance checks from possible mechanical faults. No model-specific manual or product test data was supplied, so procedures are kept conservative and readers are directed to their brewer’s instructions.
We do not claim to have tested or repaired your machine. Keurig models differ in reservoir design, needle access, settings, and descaling steps, so the owner’s manual and manufacturer support take priority whenever instructions conflict.
Final Thoughts
For a half-cup problem, begin with reservoir placement, selected brew size, and a water-only cycle. Clean the pod holder and needle as the manual directs, then descale only with the approved process if mineral buildup is plausible.
There are no products supplied for this guide, so we cannot name a best overall, value, or specific-use brewer. If your current machine still cuts off after basic care, compare replacement formats in our single-serve coffee category and consider capacity, footprint, cleanup, and pod costs.
For a different brewing routine, our drip coffee maker category covers brewers designed for larger batches. Keep your Keurig manual available, because the safe cleaning and maintenance steps depend on the exact model.
FAQs
Why does my Keurig brew only half a cup even with a full reservoir?
A full reservoir does not rule out a blocked needle, restricted internal flow, mineral buildup, or an incorrect brew-size setting. Try a water-only cycle and follow the manual’s cleaning steps to narrow the cause.
Can a clogged Keurig needle cause a short brew?
Yes. Debris around the pod puncture or exit needle can disrupt water flow, so clean the removable parts only as your model instructions allow and handle needle components carefully.
Should I descale my Keurig if it stops halfway?
Descaling may help if mineral deposits are restricting flow, but it will not fix every cause. Use the solution and procedure approved for your exact model, then complete all instructed rinses.
Why does my Keurig brew a full cup without a pod but not with one?
If water-only brewing works, inspect the pod, pod fit, holder, and needle for damage or debris. Try a fresh compatible pod after cleaning, rather than forcing the lid or puncture mechanism.
Can the selected cup size make my Keurig dispense less coffee?
Yes. The selected brew-size button controls intended output on models with size options. Check the display or buttons and confirm their meaning in your model’s manual.
How often should I descale a Keurig?
Follow the schedule in your owner’s manual and any maintenance alerts on the machine. Water mineral content and usage affect buildup, so one schedule may not fit every home.
Is it safe to clean a Keurig needle with a paper clip?
Do not assume a paper clip is safe for every model. Needles are sharp, and improper probing can damage parts; unplug the brewer and use only the cleaning method in its manual.
When should I contact Keurig support about a half-cup brew?
Contact support if the problem persists after model-approved cleaning and descaling, or if the brewer leaks, shows persistent errors, or behaves unusually. Check warranty coverage before arranging repairs.
Could a different brewer suit my routine better?
If repeated maintenance does not resolve the issue, compare brewing formats and daily cleanup needs before replacing the machine. Our coffee maker category outlines options beyond single-serve brewers.