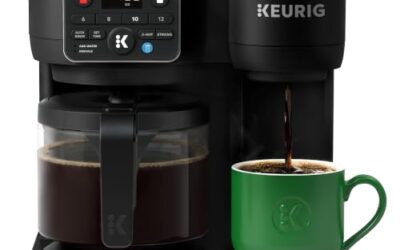

When coffee drips slowly, splashes, or stops brewing, a clogged entrance or exit needle may be one cause. This guide explains how to clean a Keurig needle safely, without forcing tools into parts or skipping basic precautions.
Needle locations and cleaning instructions vary by brewer, so check your model’s manual before removing parts. For broader pod-brewer care, see our Keurig coffee makers guide.
Start with the brewer unplugged and cool. Never put fingers near a needle while the machine is powered, heating, or brewing; puncture needles are sharp.
1. Unplug the brewer and prepare your workspace
Switch off and unplug the machine, then let it cool fully if it was recently used. Remove the water reservoir only if your manual identifies it as removable.
Set out a clean cloth, a mug, and the needle-cleaning tool supplied with your model, if available. Avoid knives, sewing needles, and other improvised metal tools that can injure you or damage the brewer.
2. Remove the pod holder only as directed
Open the handle and take out any used pod. If the pod holder assembly is designed to lift out, follow the manual’s release instructions rather than pulling or twisting it.
Some brewers have an upper entrance needle that pierces the pod lid and a lower exit needle that sends brewed coffee into the cup. Access differs by model, so do not assume both can be removed.
3. Clear visible debris gently
Look for loose grounds around the pod holder and needle area. Wipe accessible surfaces with a damp, lint-free cloth, keeping your fingers clear of sharp points.
If your manual provides a needle-cleaning tool, use it only as instructed. Do not push hard, enlarge an opening, or force a tool into a blocked needle; stop if it catches or the part resists.
4. Rinse removable parts and reassemble
Rinse removable pod-holder parts under running water if the manual says they are washable. Clear away grounds, then let parts drain and dry as directed before putting them back.
Reinstall each piece in its correct position and close the handle without forcing it. A misseated holder can affect pod piercing or brewing, while forcing it may damage the assembly.
5. Run a water-only brew and check the result
Plug the brewer back in, fill the reservoir, and place a mug beneath the outlet. Run a brew cycle without a pod if your model’s instructions allow it.
Check for a steady flow and leaks, and discard the water. If the machine still brews slowly or incompletely, repeat only the manual-approved cleaning steps rather than probing deeper.
6. Decide whether the problem is really the needle
Slow brewing can also come from scale buildup, a water-supply issue, or another obstruction. Needle cleaning removes accessible debris; it does not replace descaling when mineral deposits are the cause.
Follow your brewer’s descaling schedule and use only products the manufacturer permits. If you need a replacement brewer, our single-serve coffee maker category explains this general format.
Why You Should Trust Us
This guide uses general care principles and distinguishes them from model-specific instructions. Needle access, removable parts, and approved cleaning methods vary, so your brewer’s manual takes priority.
No product testing or product-specific specifications were provided for this guide. We therefore do not claim that a particular tool, cleaning method, or brewer produces a measured improvement.
Final Thoughts
For a suspected needle clog, unplug the brewer, let it cool, and use only the cleaning method approved for your model. Gentle cleaning and a water-only verification brew are safer than forcing a sharp object into the needle.
No products were supplied for comparison, so there is no evidence-based best overall, best value, or use-specific product pick here. If careful cleaning does not restore normal brewing, consult the manual or manufacturer support rather than disassembling sealed components.
FAQs
How often should I clean a Keurig needle?
Clean it when you notice grounds, interrupted flow, or other signs of debris, and follow your model’s manual for routine care. Avoid repeatedly probing the needle when no blockage is visible.
Can I clean the needle while my Keurig is plugged in?
No. Unplug the brewer and let it cool before cleaning, since the needle is sharp and the brewer contains electrical and hot-water components.
Can I use a paper clip to unclog a Keurig needle?
Use the cleaning tool supplied or specified for your model instead. A paper clip can slip, damage the needle, or push debris farther inside.
How do I clean a Keurig needle safely without its tool?
Check the manual for an approved alternative. Wipe accessible surfaces gently with a damp cloth, but do not insert an improvised object into the needle opening.
Why does my Keurig still brew slowly after needle cleaning?
Scale buildup or another obstruction may be responsible. Follow the manufacturer’s descaling and troubleshooting instructions; needle cleaning alone cannot address every cause of slow flow.
Can I remove the Keurig needle assembly?
Only remove parts that your model’s manual identifies as removable and explains how to release. Do not force the needle assembly or open sealed components.
Should I run a brew cycle after cleaning the needle?
A water-only cycle can help flush loose debris and verify flow if your manual permits it. Use a mug to catch the water and discard it afterward.
What should I do if cleaning does not fix my Keurig?
Stop if parts resist or the brewer leaks, then consult the manual or manufacturer support. For general alternatives, browse our coffee makers category.